7 Ideas and Tips for Winter Landscape and Wildlife Photography
13th December 2020

Are you interested in getting more serious about winter landscape and wildlife photography this year? Looking for advice and inspiration? I put together a few ideas in this blog to help you successfully, and safely, get out in nature this winter and come back with images that you are happy about.
What defines a winter image? For many, it is the presence of snow and ice. For this blog post, I want to share some ideas for how to photograph in the presence of snow.
How to photograph in snow?
1. Meter the snow properly. I use evaluative metering and set my exposure compensation higher, usually starting +1 stop or even more sometimes. You may need to go more or less, and it might depend on which direction you point the camera even while you are standing in the same spot. The key is to look at your histogram (or learn what that is first) and push your exposure as far right without having any of your highlights clip all the way to the right and blow out the detail. This step of metering for the snow and usually boosting your exposure compensation a stop is crucial because cameras will underexpose snow and make it appear grey if you don't increase the exposure compensation.
For example, the camera metered the snow in this scene too dark/gray:

Same shot with +1 exposure compensation. Notice the snow looks white, like snow!
True, you can add extra exposure in post processing in Lightroom, but you will introduce more noise and also risk losing detail in the shadows by relying on fixing in post. Better to get things right in the field!
2. Consider the light.
Is it a cloudy day with flat light? If so the snow will look blank with no texture, shadows, or features.
This is a good time to put a person in the shot.
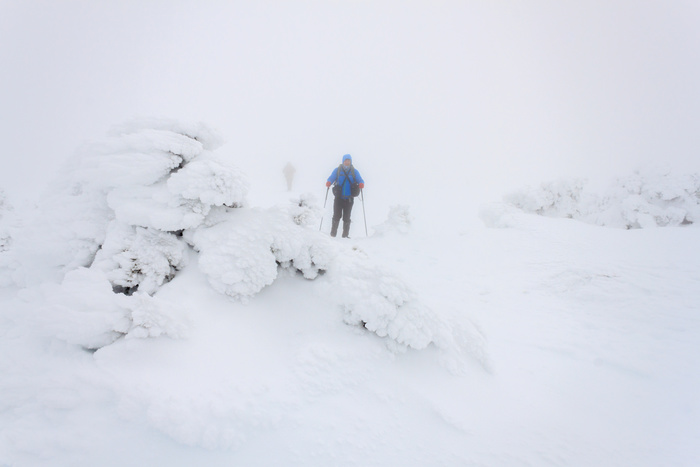
In this example above, there was a whiteout on Mt. Pierce 4310' in the Presidential Range of the White Mountains of New Hampshire. It was hard to even navigate. You can see how the camera picks up snow is this light as featureless. Adding the hiker 10 yards away helps the picture, but can you see the second hiker another 10 yards behind him? This shot provides a good lesson in being careful above treeline in low visibility situations. Turn around! Too many people have had bad outcomes for not doing so.
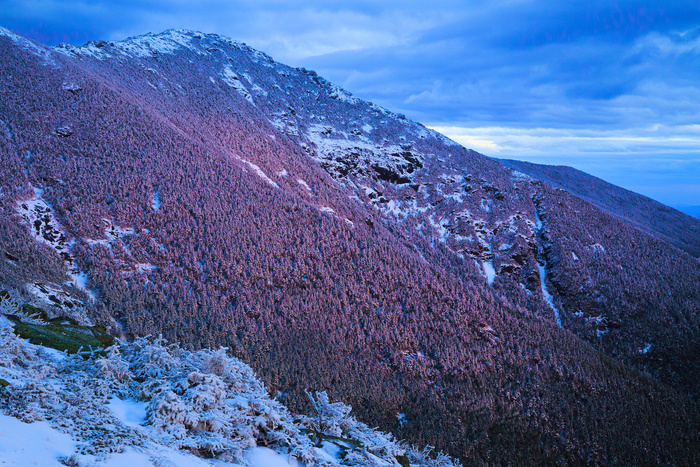
Is there direct sunlight? If so the texture of the snow crystals and shadows of the shapes will be evident in your photos. I think grand scenics like the one below look much nicer when it is sunny in winter than in cloudy flat light. So check the forecast and plan your shooting goals accordingly!
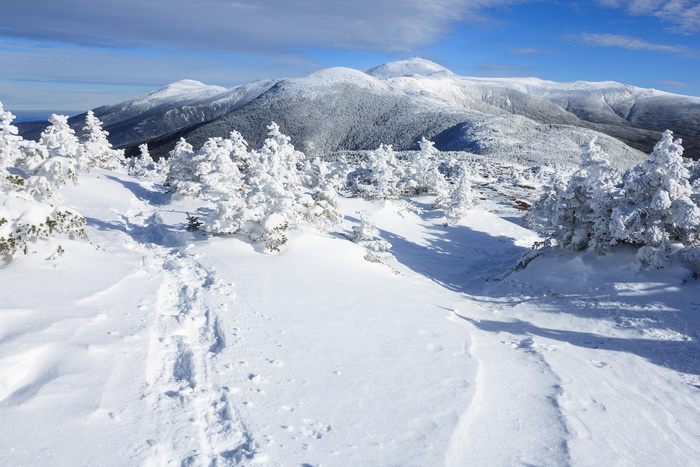
View from Crawford Path in between Mt. Pierce and Mt. Eisenhower towards Mt. Washington, and the Presidential Range, White Mountains, New Hampshire
There is often good sidelight in winter because of the low angle of sun most of the day.
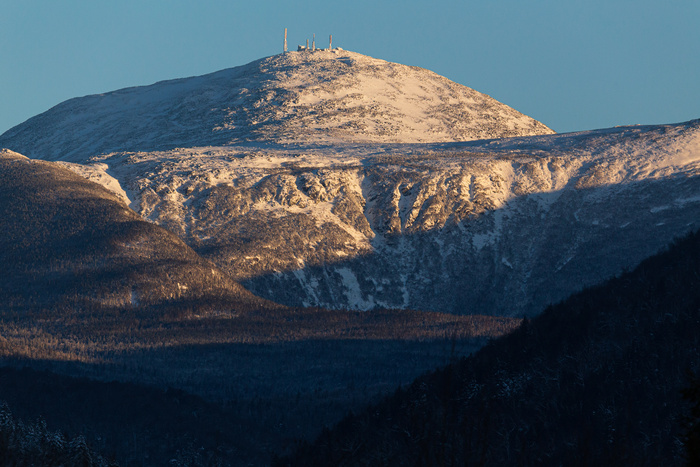
I missed sunrise that day, but the sidelight on Mt. Washington was still nice in the morning.
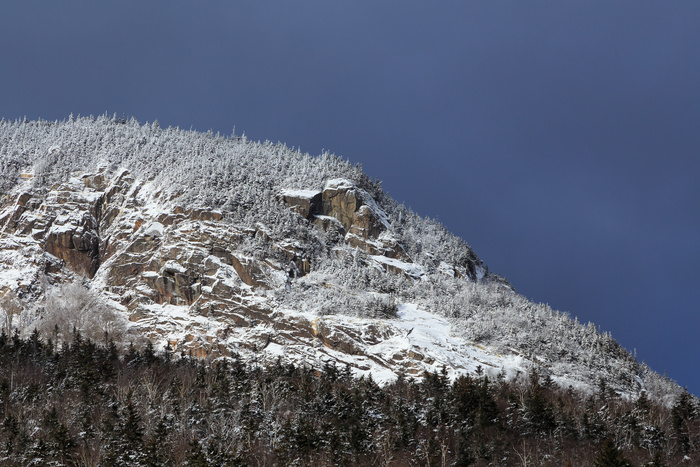
The cliffs on the East Peak of Mt. Osceola as seen from Greeley Ponds, White Mountains, New Hampshire. This image was made after the clouds started to break around 10 am. You would never have this low of a sun angle in summer and such a nice quality to the light at that hour.
The snow also can provide reflected light that can act as natural fill light for your subjects. In the photo below, the hiker's jacket is lit up from reflected light off the snow as if a flash unit was used, even though the sun is in front of him and would have created a more shadowy figure.
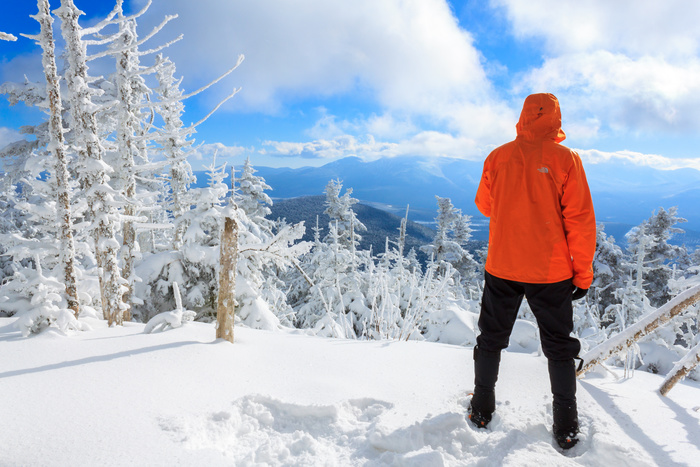
Winter hiker on Mt. Waumbek 4006', White Mountains, New Hampshire
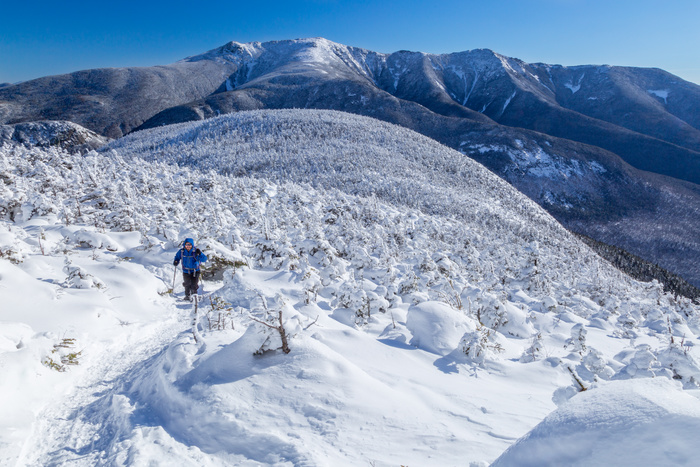
Your subjects can also look good backlit, as in this shot of snowy spruce trees around 3400' on the Kinsman Ridge Trail on 4100' Cannon Mountain.
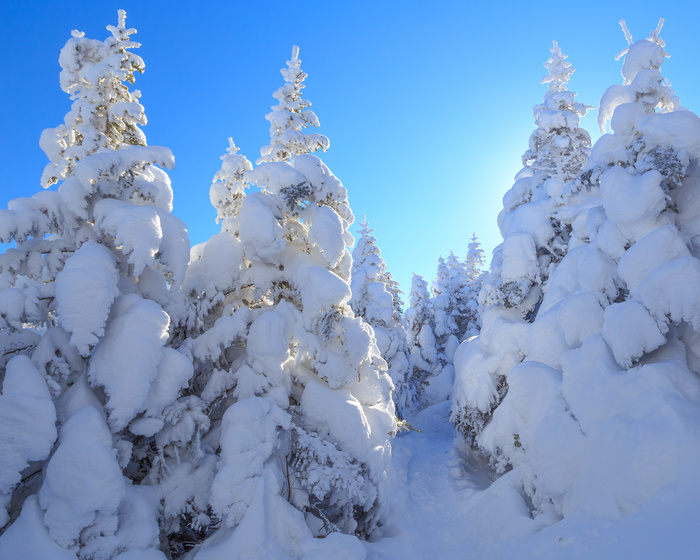
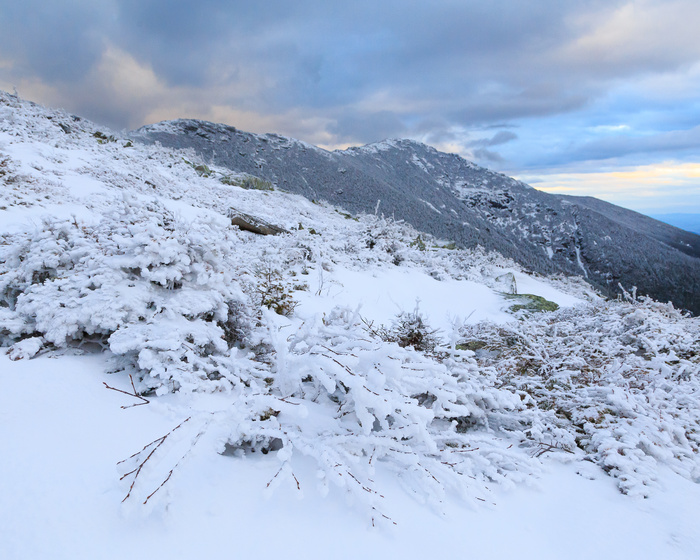
3. Use snow (or ice) to simplify your image and draw greater attention to your subject.
Snow greatly simplifies the usually cluttered forest floor as evidenced in this shot of the usually chaotic spruce forest around 4000 feet in elevation in the White Mountains of New Hampshire
In this image, the eye is drawn to the opening in the ice that this Great Blue Heron is hunting in:
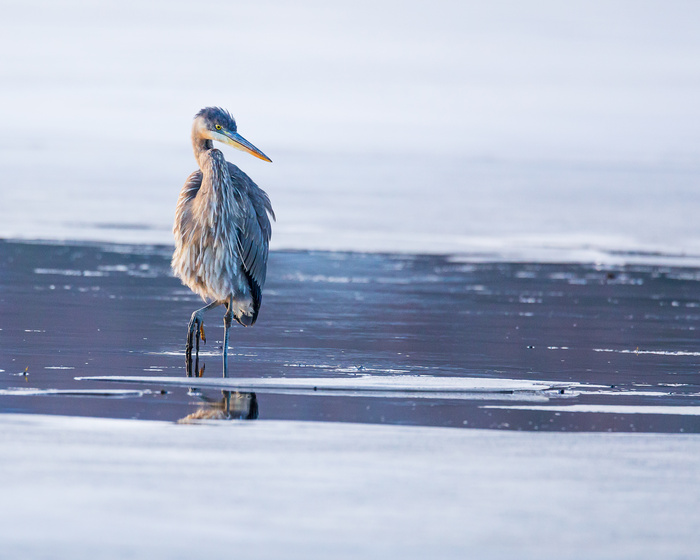
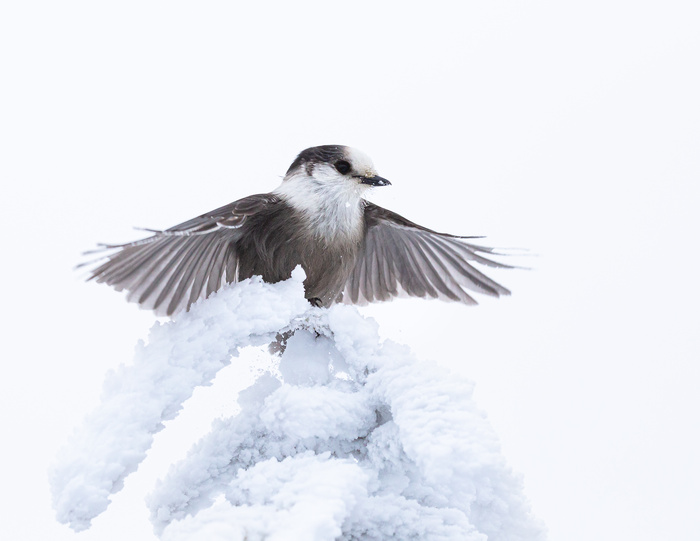
Snow can simplify the colors surrounding your wildlife making the subject really stand out.
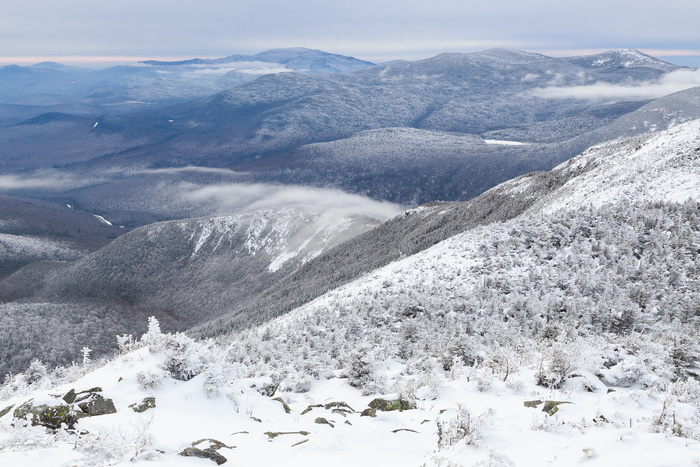
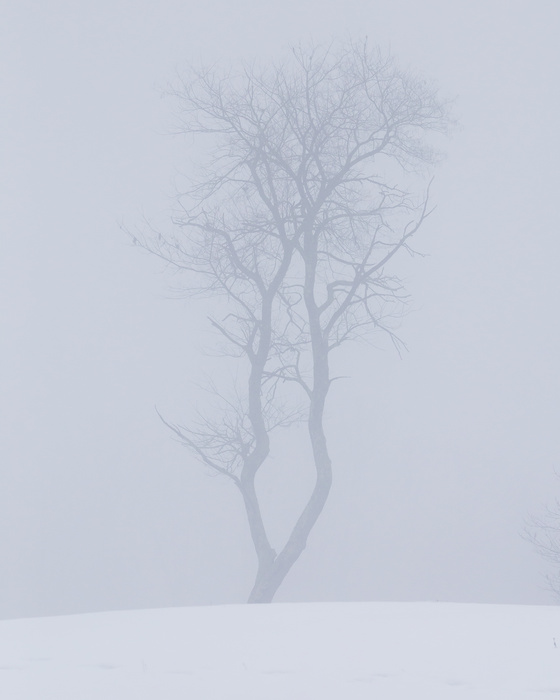
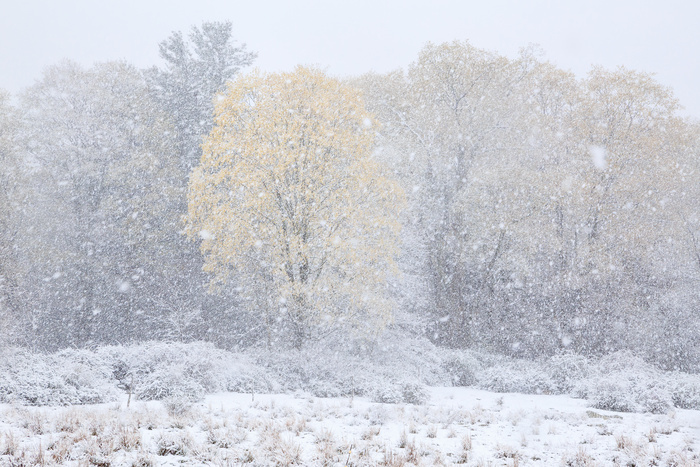
Adding fog to snow can really make for a simple composition, as in this tree across a farm field.
4. Consider making black and white images. There is not much color in a lot of winter photography anyway, so if you get a scene with a lot of natural contrast start to think in terms of black and white.
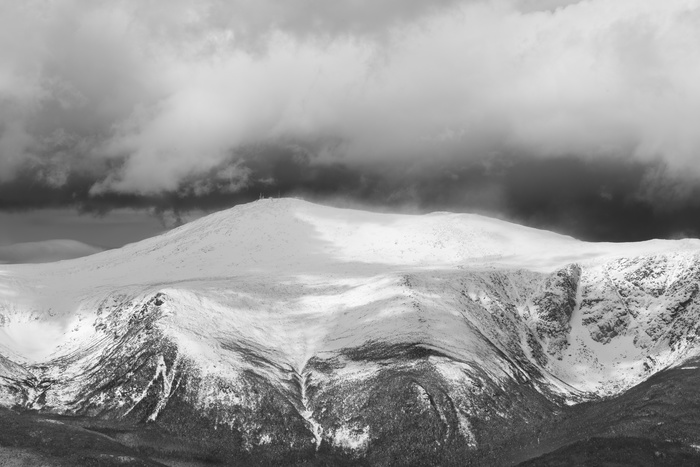
High winds and clouds hit the summit of Mt. Washington 6288' as viewed from Wildcat Mountain.
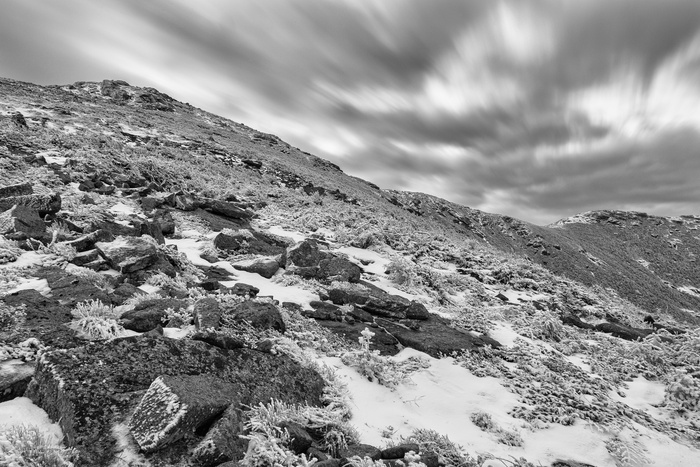
Long exposure of clouds moving over Franconia Ridge
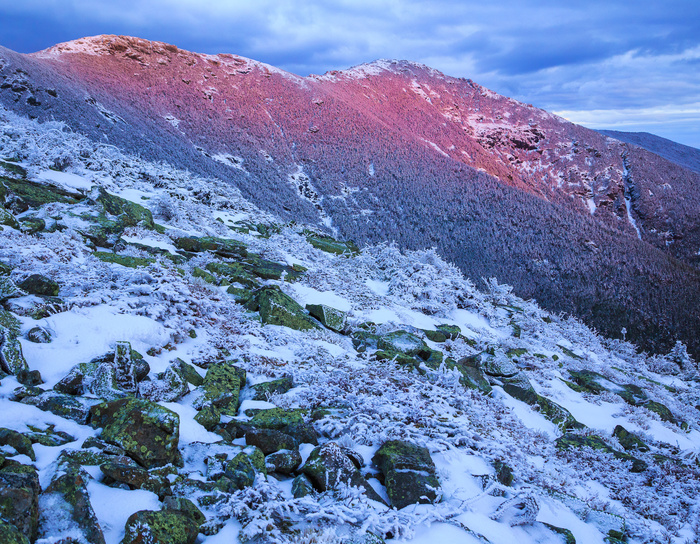
5. Take advantage of sunset and sunrise lighting to break up the monochrome. One of the best ways to get some color into winter shots is to shoot before/after/during sunrise and sunset. If you have a snowy scene, the light from the sky will be reflected in the snow.
Reflected sunset glow in the snow on Franconia Ridge
6. Put a person in your winter scene. People always add scale to a shot, but a brightly dressed hiker can really attract the eye in winter.

Also, a colorfully dressed hiker can add interest in those flat light scenes.
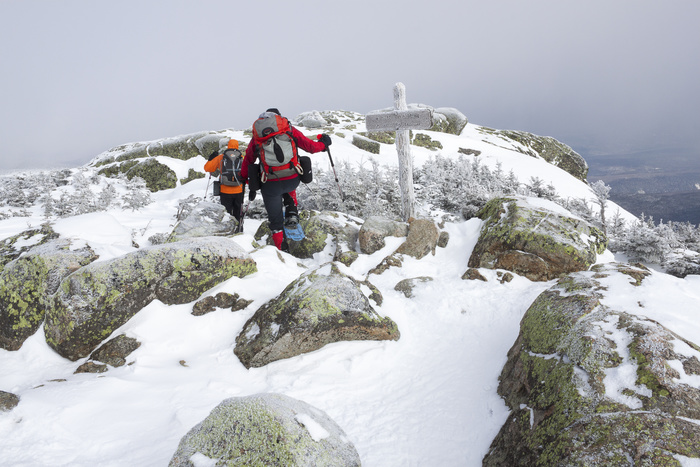
Hikers top South Twin Mountain 4902' on the Appalachian Trail on a zero degree winter day.
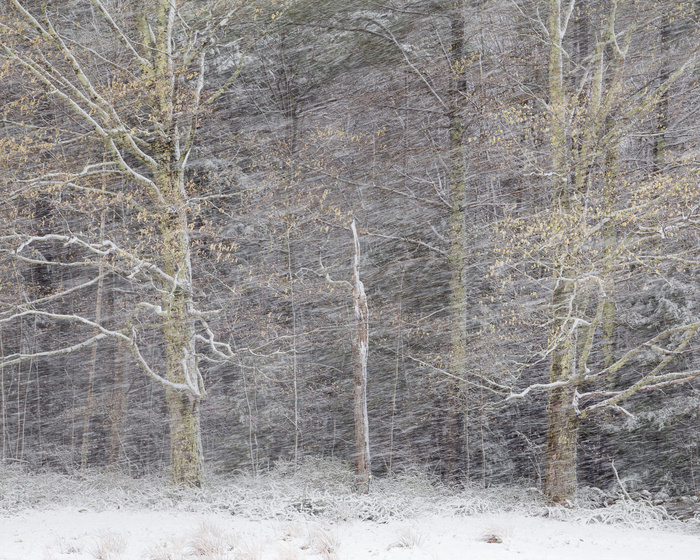
7. Capture images of falling snow. If you want the snow appear streaking across your scene, use a relatively slower shutter speed. If handholding try something in the 1/30 to 1/50 range which is usually the lowest you can still keep the rest of your elements in your shot crisp with Image Stabilization. If you have a tripod, obviously you can go slower if you want. Try to find a scene like this one that has some shadows or dark elements so that the view can notice the snow streaking through.
You can also capture dramatic images of snow squalls in the distance.
Those are some ideas to get you started. Stay safe and learn about how to take care of yourself and camera equipment in winter before venturing out into the field!